The Sewing Place

Show Posts

This section allows you to view all posts made by this member. Note that you can only see posts made in areas you currently have access to.


Messages - Mick

Pages: 1 [2] 3 4
16
Access All Accessories / Re: Quick & Easy Tool Roll
« on: November 09, 2021, 06:30:35 AM »
 @steve_h Sadly, we don't have Harbour Frieght over here.

However, last year I had some decorating to do, and bought a couple of canvas drop sheets from a local DIY chain.

A bit more expensive than H F price, but even at that, as you say, it's an awful lot of pretty usable fabric for not very much money.

To be honest, I never really thought about re-purporsing it into anything else.

But now you've gone and given me the idea... :thinking:


17
Vintage Machines / Re: Sharing my treadles
« on: October 18, 2021, 21:17:09 PM »

My machine is a Singer 66 Red Eye that I am restoring. I bought it a week ago. The hubby says it’s a boat anchor since it needs a lot of work but has helped me with a couple of things- like getting screws out cause he is good at that as well as opening jars.  This machine was frozen up and the cabinet is damaged. I’ve cleaning the machine head and now it’s waiting for parts. I tore the cabinet apart and am working on getting the finished cleaned up. I can’t wait to see how well it sews. I plan on using them both so they are not going to be decor.

They are both beautiful machines, and you should use them. These machines were designed to be repaired and are always fixable, with a bit of time and patience. The secret, apparently, is plenty of oil.

I use a 66 on a treadle cabinet. Mine is a Lotus pattern, built in Scotland in 1917.

Yes, I'm sad enough to have researched it's history... :rolleyes:

I find sewing with it is a kind of Zen experience, calming and quiet.
No electric motor whizzing, no buttons to press or fancy stitch patterns to try to find uses for.
It just does the one thing, and does it very well.

Please, keep us posted with the restoration.

18
Access All Accessories / Re: Quick & Easy Tool Roll
« on: August 22, 2021, 17:09:17 PM »
@Sara-S This was the first one.  https://thesewingplace.org.uk/index.php/topic,8956.msg150644.html#msg150644

The second one got blagged by a friend, before I could get a picture.

This is number three.
Because I ride a fairly old, and notoriously unreliable, motorcycle I like to have a few tools with me.


It's pretty crudely sown I'll admit, but better than having all the stuff rattling about loose in the bottom of the saddlebag.

19
Access All Accessories / Re: Quick & Easy Tool Roll
« on: August 22, 2021, 14:10:16 PM »
These things get to be quite addictive, don't they?

I've just finished my third (and most ambitious) one.

As you say, quick and easy. But something you'll actually get the use out of.

20
That's great @Mick

....How come it's not reversed though? Did the rust go all the way through the fabric?


No, but the cuts go all the way through the sign.
So by putting it with the "wrong" side down on the fabric, the dyed image comes out the right way round.

Yeah, I know, and it took me two goes to get it right. Good job I had a few spare napkins... :facepalm:

21
Mick's entry for the competition.

Some pot towels, a table napkin and half a ripped quilt cover.

The pot towels are very heavy duty things, meant for catering and restaurant kitchens. They have a hard life, and when they get shabby and stained enough, they are "retired" by the commercial laundry that looks after them.
Table napkin is from the same source.
The quilt cover should need no explanation.


The other essential part of the project. A rusty, cut-steel sign that I bought from a junk shop years ago.


Soaked the napkin in salt water, layed the sign on top, and left alone for a couple of days to rust.
The salt makes the metal rust faster and also acts as a fixative for the rust to dye the cloth.


The finished item.


The pattern used was a free download for a sweatshirt. It was meant to be sewed from stretch fabric with ribbed cuffs and waistband. So it took quite a bit of hacking about to get it work in the pot-towel woven cotton, and with the quilt cover made into a full lining.
I didn't quite get it right and had to let the quarter zip in to make it a bit easier to get on and off.
(I'm blaming the pattern, ok? Nothing to do with me being a bit of a fat old git, these days.)
Gave the unlined garment a light tea-bag dye to take the whiteness off a bit.
The zip came from an old pair of jeans my daughter was trying to throw away.


22
My entry is finished, just got to find time to sort the photos out.

23
I've got some old pot towels, a ripped up quilt cover, and a vague sort of plan... :thinking:


24
Previous sewalong entries / Re: "Fit for Purpose" January 1-31 2021
« on: February 03, 2021, 20:41:38 PM »
@Catllar  Muay Thai fighter are the best there are. Most sign up to a training school around six years old, and then devote the rest of their life to the sport. Very few westerners have ever been able to compete on their terms.

I mostly fought in a style known as K1. The Thai would probably consider it a bit "girly", as we weren't allowed to break each others legs.  :o


25
Previous sewalong entries / Re: "Fit for Purpose" January 1-31 2021
« on: February 02, 2021, 21:11:15 PM »
Very nice @Mick. Kick boxing ? Same as they do in Thailand?

Much the same.
The sport originated there, and the Thai people are still the masters of it.

Nowadays the Western version has a few more rules, to try to prevent the competitors getting too badly hurt.
It's still pretty brutal though, and a man my age has no place kidding himself he can still compete.
Much safer if I stick to sewing...
 :'(

26
Previous sewalong entries / Re: "Fit for Purpose" January 1-31 2021
« on: February 02, 2021, 19:33:37 PM »
Your User Name and Entry Number
Mick’s one and only entry for the competition.

What is it and for whom.
A sleeveless posing training hoodie for me.

Before old age, arthritis, and general decrepitude got the better of me, I was a keen kickboxer
and sometimes, cage fighter.
Normal gymwear in those days was always a sleeveless hoodie, as they keep your torso and neck muscles warm without restricting your arm movement.
I’m not allowed to fight any more, and got rid of most of my old training gear a while ago, but I still work out occasionally, and thought there was no harm in re-living the glory days a little.

Fabric and Pattern/instructions used.
Fabric is some “Heavy-Duty Sweatshirt Fleece” and matching Stretch Cuffing. Both from Ebay.
Pattern was a free download from this lovely lady’s site.
https://mellysews.com/sewing-projects/
Came as a 15 page A4 print out, which worked perfectly through Adobe software. The calibration scale was spot on, without correction, and all the lines matched up between sheets with no errors or steps. (Huge sigh of relief).
Back and front pieces were very similar, with just differences in the neckline shape, and were overlayed on the print out. So I traced the front onto a separate sheet, just to make laying out on the fabric a bit easier.
The site also includes an idiot’s guide video on sewing the thing. Handy for me, that.


A short description on how you made it.
Didn’t need the sleeves, obviously, so didn’t make them. Just did some short cuffs around the arm-holes.

Any problems overcome etc.
Oh my goodness, isn’t stretchy fabric fun stuff to sew on a vintage sewing machine…


27
Previous sewalong entries / Re: "Fit for Purpose" January 1-31 2021
« on: January 31, 2021, 20:07:57 PM »
Mine is finished, just need the time to take a few pictures...

28
Vintage Machines / Re: Two-for-one bargain?
« on: January 27, 2021, 22:01:41 PM »
The cabinet looks too utilitarian to be Art Deco to me (a better pic of the handle could help) might be 40's ???

Now that I've had time for a closer look at the cabinet itself, @Iminei the more I think you are right.

This one is made from veneered blockboard, and held together by heavy steel knock-down fittings. Earlier cabinets would probably have been solid hardwood, and used traditional joinery.

Also, the hardware is fastened with cross-head screws. These weren't invented until the early 1930's, and not widely used until much later in that decade.

So yes, your "stylistic" estimate of the 1940's is probably pretty much spot on.

 :thumbsup:


29
Vintage Machines / Re: Two-for-one bargain?
« on: January 23, 2021, 13:18:17 PM »

...but am I right in thinking that you give the handwheel(?) a good push in the right direction to start it off?


On this one the flywheel has been made deliberately out of balance, one side heavier than the other, so left to itself it always stops in the same position, with the Pitman just forward of top centre. So as long as you "heel" the treadle plate it always starts in the correct direction.
It's an ingenious piece of design that completely fails to work when the sewing machine is attached.

So to answer your question; yes, as with so many things in my life, it needs a gentle shove to get it going the right way.

 :)

30
Vintage Machines / Two-for-one bargain?
« on: January 22, 2021, 23:03:06 PM »
Or just double the trouble?

I have a Singer model 66, that I use regularly. It is a lovely machine, but it’s hand-cranked and so a bit awkward for a clumsy git like me. I really need both hands to steer the fabric through the machine.

A treadle cabinet seemed like an interesting solution. Certainly more appropriate than sticking an electric motor on it.
So for a while, I’ve been looking for one to come up nearby at the right price.

Then this appeared on a Local For Sale group on Facebook.


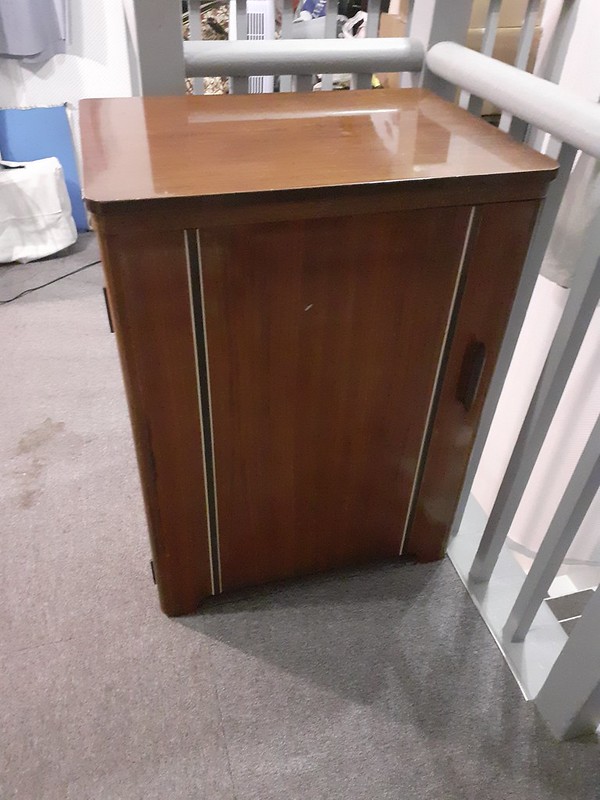
The cabinet looked OK in the photos, and I was happy with the price it was offered at, even without the green electric machine fastened to it. That would just be a bonus.

My plan was to stick the green thing straight on Ebay, and so hopefully, almost end up with the cabinet for free.

I already have a modern, electric Singer, with all the good and bad things that go with owning a modern, electric Singer. So I didn’t need another machine.
No, really, I didn’t...

The seller turned out to be a charming lady, who had bought the whole set-up on a whim, and had never even tried to use it.
Besides, she had far too many other machines, and now wanted the space in her sewing room back. Hence the low price.

The cabinet itself was a bit tattier than the pictures suggest, but I was buying it for practicality, not to admire it’s beauty.

There were a couple of problems I could see with the treadle mechanism itself. The Pitman link was missing, as was the skirt guard and the little de-railing mechanism that pushes the belt off the flywheel when you want to fold the machine away.

It was still worth the asking price, even with the missing bits.

The guard was no problem, I don’t wear voluminous crinoline skirts when I sew, (or at any other time, honestly...) so getting my clothes tangled in the belt wasn’t really going to be an issue.

And I’m quite capable of de-railing a belt by hand, so I wouldn’t miss that gadget either.

That Pitman link though.
It’s the rod that connects the treadle plate to the flywheel, and without it the thing obviously won’t work.

Still, I’m a mechanical engineer by trade, so making a replacement was something I could do.


Buying a new leather drive belt, during the Christmas / Covid Lockdown period, turned out to be more of a challenge, but soon enough it was my eager little hands, and it was time to fit it all together.


I suppose it says something about the nature of the old Singer company that those little lollypop-shaped hinges that allow the machine to fold down into the cabinet, fitted perfectly into the  mounting holes in the 66, which was built in 1917, as well as the green machine, which dates to the mid 1960’s, and that the mounting center spacing in the cabinet had clearly never varied in all those years either, as everything lined up perfectly.
The cabinet’s actual date is a bit of a mystery, could be anywhere from the 1920’s to the early 40’s. Seems that once they had a successful design they tended to stick with it.

Anyway, historical research aside, how does it sew?

Like this…


“Treadle technique” takes a bit of getting used to, but once you can get the thing to start in the right direction every time, and not just snap the needle thread by going backwards, it’s a delight to use.

Quiet, perfectly controlled sewing speed, and both hands free to turn the corners.

Really enjoying it so far.

And as for the Green Meany ?

I’ll give you a clue.
It's never made it onto Ebay.

Updates to follow.  ;)


Pages: 1 [2] 3 4