Ladies and Germs,
I have been asked a couple of times now, if I would post a blow by blow tut on how to make a simple cot quilt for those Nervous Newbies timidly tiptoeing into The Dark Side for the very first time .....
So Here 'tis ........ Hopefully you will sewalong with meDay 1...I want to create a cot quilt about
36 x 45 inches large, which is a nicely manageable size on most everyone's machine.
I have some fabulous curtain fabric from Sanderson featuring a treasure map that I know looks great fussy cut;

I picked this up as a remnant from my local Interior design shop, and am going to surround the feature squares with squares in coordinating and complimentary colours picked from the design.
Your Feature fabric could come from an old pair of curtains, a duvet, a shop remnant (like mine) or a specially chosen pictorial fabric. The complimentary fabrics were bought as FQ's so this needn't be an expensive make ...
Lets audition fabrics....
I'm looking for colours in the pictorial design...
A good tip is to look at the selvage of your Feature fabric. All the colours in that fabric will be marked as dots along the selvage enabling you to closely match your CF.....
The blue is quite grey in colour ...

There is no red in the print, its a coral colour, more a pinky red..

I'm trying also to use similar patterns in the coordinating fabric...
Small polka dots work well for this and wavy designs would look good as they would pick up the waves of the sea. I have some nice blue wavy design somewhere, you might see that appear later when we start cutting the squares.
Now to the Maths! (Brendaaaaa !!!)
From here on in I'm going to use
FF for the fussy cut squares and
CF for the surrounding coordinating squares to (hopefully) avoid confusion.....
To get a good FF, looking at my fabric, I need a 6" (finished size) square .....
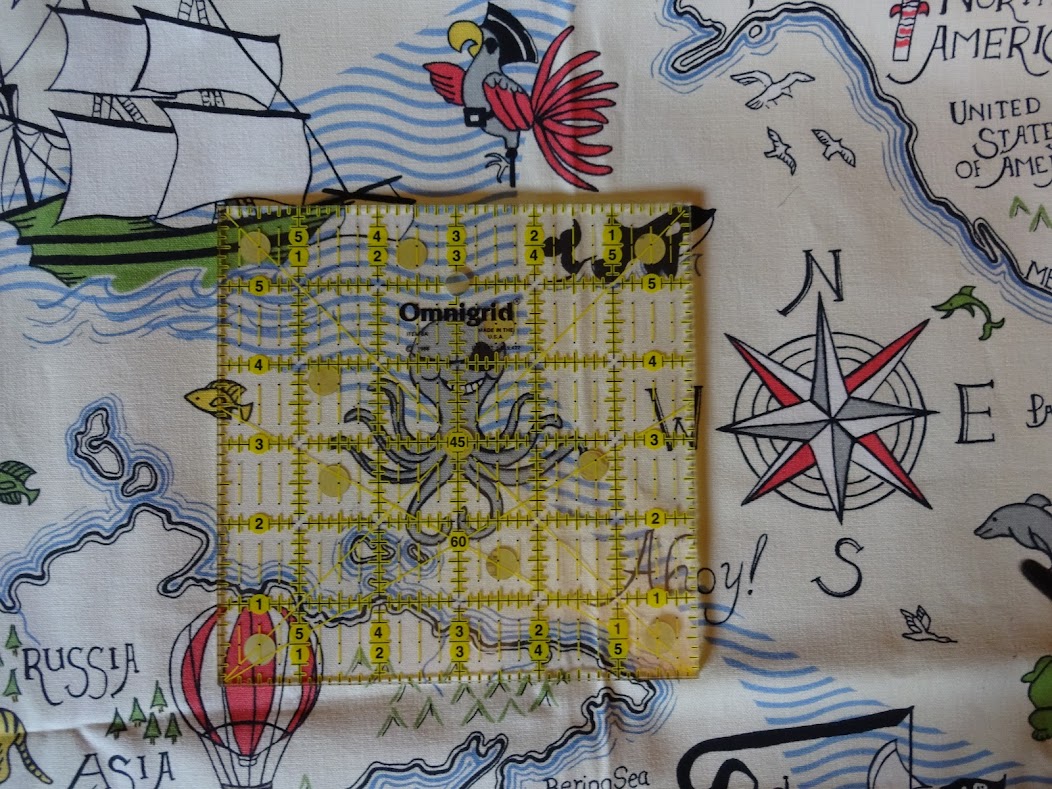
Your FF square may be smaller, depending on your design.
Lets look at the Rows (across the quilt) first.
We need to get to a measurement of 36".....
which divided by 6 (the size of my finished FF square) = 6 Rows,
which if we surrounded the FF's by CF of (whichever size, that multiplies into 6) ...
2" (nah! too weeny) ... 3" or 6"
produces ....
CF, CF, CF, CF, CF, CF
CF,
FF, CF, CF,
FF, CF
CF, CF, CF, CF, CF, CF
would mean we would only have two FF across the width of the quilt .....
That could work out, but what if we only had one set of CS between the FF ????
CF, CF, CF, CF, CF, CF
CF,
FF, CF,
FF, CF,
FFCF, CF, CF, CF, CF, CF
Then we could have 3 FF across but one of the FF would be on the edge of the quilt ... No good!
What about the outside CF being half sized, ie 3" wide by 6" deep ???
1/2CF, CF, CF, CF, CF, CF, 1/2CF
1/2CF,
FF, CF,
FF, CF,
FF, 1/2CF
1/2CF, CF, CF, CF, CF, CF, 1/2CF
That could work...
Now lets look at the Columns (down the quilt)...
we are hoping to get a measurement of 45"
which divided by 6 = 42 (7 columns) or 48 (8 columns)
I think as this is a cot quilt .... less is more
So 6 rows by 7 columns .....
I think I will make the top and bottom squares half sized ie. 3" deep x 6" wide to tie up with the half sized sides as well,
Though this presents a problem with the placement of the FF squares....so maybe to leave the top and bottom rows as full sized squares ...
1/2CF, CF, CF, CF, CF. CF, 1/2CF
1/2CF,
FF, CF,
FF, CF,
FF, 1/2CF
1/2CF, CF, CF, CF, CF, CF, 1/2CF
1/2CF,
FF, CF,
FF, CF,
FF, 1/2CF
1/2CF, CF, CF, CF, CF, CF, 1/2CF
1/2CF,
FF, CF,
FF, CF,
FF, 1/2CF
1/2CF, CF, CF, CF, CF. CF, 1/2CF
This will end up (hopefully) as 36" x 42" ....
Now remember that we have been working out our design using
finished sizes...
When we get to cutting, we will be adding 1/2" on each of those sizes to account for the seam allowances.
I hope you are with me on this so far guys!
So for those of you wanting to break your Patchwork & Quilting duck and follow along,
I need you to get together your Feature Fabric and your Coordinating Fabrics
and meet me back here when you are done......
https://goo.gl/photos/TuYqVjsiQck2HQH88Click on the first pic and bring up the destructions to the right hand side by clicking on the I Icon.
 66 Replies
 54918 Views